
Tips For Planting Your Native Garden
- John Clese

- Jan 20
- 7 min read

In my opinion, the evolution of the way we plant should not be forced upon us - even though the need is urgent - otherwise, we'll never fully adopt these new gardening practices or enjoy them. But we do need to get started, and we are passionate about helping people begin their new journey into embracing native gardening and native landscape design.
Professor and chair for entomology and wildlife ecology at the University of Delaware, Doug Tallamy, suggests a goal of converting at least 70% of our properties to native species and reducing our lawns by half. While I believe that's a goal we should all strive for, I think it's more realistic to start the process on a smaller scale and ease into native landscaping.
To help you get started on your native garden journey, I am providing you with the garden plan, the plants' bloom schedules, a 3D rendering of the garden, and links to resources for ordering your plants. By following these steps, you will see amazing results in your new, mostly native garden.
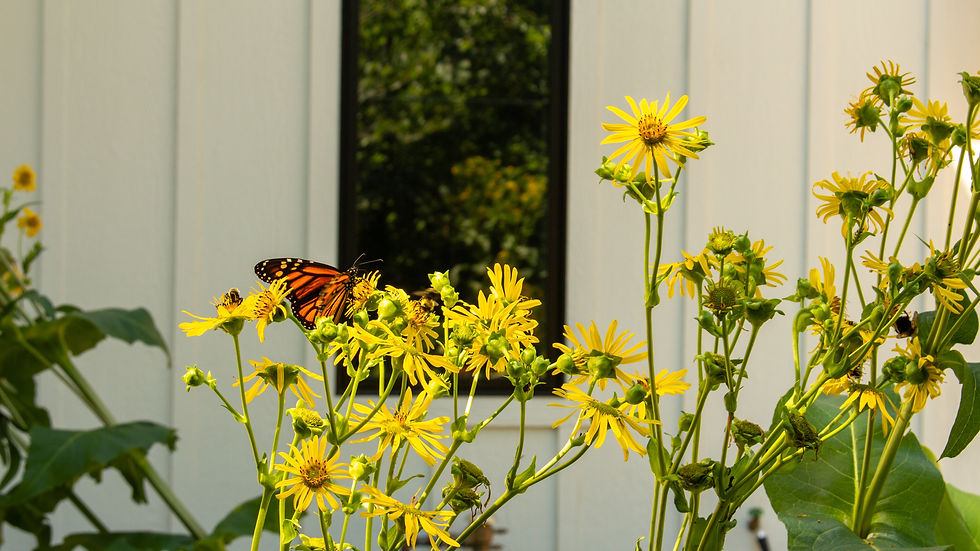
Plant Legend with Zones, Bloom Time, and Color

Planting Plan
Plants are planted one foot on center.

3D Renderings


Step 1 - Choose A Site
Plant Zones -This plan is for planting zones 4-9, with a few plants able to be in zone 3 (see plant legend with zones)
Sun Exposure -This plan is for full sun (6 + hours of direct sun a day) to part sun (4-6 hours of direct sun a day) so choose your site that fits this description best
Garden Dimensions - 10’ x 10’
# of Plants Needed -100
Soil Type - Sandy Loam (loam is soil that has about 40% sand, 40% silt, and 20% clay). Average soil, well-draining, no standing water, and not rich in organic matter. Most natives prefer nutrient-poor soil
Soil Ph - Acidic(<6.5) to Neutral (6.5-7.5). You don't always need to test your soil, but if you are creating a garden and want to be sure, or if you have an area where nothing seems to grow, you may want to test it. Lowe's and other retailers offer Soil Test Kits.
Deer Resistant - Most of the plants in this plan are deer-resistant, but I'm not sure if any are "deer-proof." If deer are hungry, they will eat anything, but you do have a better chance of deer leaving the plants in this plan alone.
Step 2 - Prepare The Site
Try to disturb the soil as little as possible to help prevent a weed invasion later on.

Replacing Your Lawn Areas
While your lawn has already been acting as an excellent weed suppressant, if you dig out the grass or till it, you risk activating more dormant weed seeds. Instead, try these options:
Spray the grass with a nonresidual post-emergent herbicide. Nonresidual herbicides are quickly deactivated in the soil. Wait about a week after spraying before planting directly into the sod. It's best to spray on a sunny day. After planting, you can put a light coating of mulch (1") across the top of the dead grass.
Spray the grass with an organic mixture. This site has some ideas, EcoWatch. I have not tried this before, and it may take several applications to kill the grass.
Solarize the spot by laying a sheet of plastic over the area for 4-6 weeks to bake the grass dead, then add a very, very light layer of mulch (1") after you plant.
Use woven weed barrier landscape fabric (only in the first year). With this process (I use this method), you cut a hole or slice an "X" through the material where the plant will be, then plant the plant through the hole. The following spring, after you cut down your garden, you'll lift the fabric off the plants and place a very, very light layer of mulch (1") on the ground. Since the material is woven, make sure your knife is sharp; otherwise, you will have a lot of threads. If you are really handy, some people create a template and burn the holes.

Replacing Non-Lawn Areas
The same principle applies as when replacing lawns; try to disturb the soil as little as possible. If you're removing existing plants, just remove the plant - no need to turn over the earth or amend it in any way.
Step 3 - Order Your Plants Online or Find Them Locally

Resources for Ordering and Delivery
Stantec's Native Plant Nursery - You need to contact them to request a price quote and delivery.
Check your local county conservation office, as many counties now offer native plant sales.
Step 4 - Plant Your Garden
You might be able to find natives in various pot sizes (like other perennials), especially later in the season. However, in my experience, at this time, most natives you find are with either a bare root plant, a small plug, or, at most, a 2.5" pot.
Bareroot Plants
If you've never planted bare roots before, you are in for a treat - just shove a spade in the ground, wiggle it back and forth to open up the earth, then place the roots in the hole with the crown facing up. Make sure you don't cover the crowns with soil.
Plugs
You'll also find native perennials in plugs. I love plugs! They are lightweight to carry, and you only need a little hole for planting, which means less work!
If you have the budget, I recommend getting a couple of trays of Carex pensylvanica and planting these grasses around the purple coneflowers to cover the ground around their stems. You can plant these Carex about 8" apart from each other. You can also add these the following year to fill in any bare spots you want to cover up and suppress weeds.
Step 5 - Maintenance (Dos and Dont's)
Do water every 2-3 days for the first season, if the plants look healthy or you have a rainy period, don't water them.
Don't fertilize, they won't need it, and most natives thrive in low-nutrient soils. If the ground is too fertile and organic or if you fertilize, you will likely end up with spindly-looking plants.

Do keep the weeds out. The best way to do this is to either use a light dressing of mulch or landscape fabric (with a light coating of mulch if you like), spot spraying, or clipping the weeds as they emerge.
Don't pull the weeds. It's more beneficial to keep cutting them down to the ground. Pulling weeds disturbs more dormant weed seeds, waiting to sprout in your garden. And of course, if you can't stop yourself from ripping out the weeds (I admit it feels empowering!), just be careful not to disturb the plant, especially if they are small plugs or bare roots.

You don't need to deadhead or prune the plants, but you can if you want to keep them looking a bit tidier. Pruning native plants will give you results similar to pruning cultivated and exotic perennials; the plants will be a little fuller and not as tall. In the second or likely third year, I would resist deadheading spent flowers, as providing seeds for wildlife is one of the goals you are trying to achieve.

Don't cut the garden back in the fall; wait until late winter or early spring (February | March). There won't be much, if any, blooms the first year or a lot of above-ground growth, but you may have some stems and dried leaves for interest in the fall and winter, especially the grasses.
In the spring, you can run the lawnmower over the garden in a high-blade setting. I like to capture all the garden clippings using my bushel bagger attachment on my walk-behind mower, then scatter them (which will include some seeds) on other areas of the property where I want natives to start growing.
If you live in an area that allows you to burn, and you feel comfortable, you can burn the garden debris - but only after the third year.
In subsequent years, your winter garden will provide winter seeds for birds and wildlife shelter, and offer much more visual interest. Again, this is a new type of gardening, enjoy the lower maintenance!
Don't stop your plants from growing together; you want them to touch and intermingle. A thick mat of foliage will reduce the light underneath your plants and prevent weeds from sprouting. They'll also help to hold each other up.

Thoughts On This Plan
While this garden is what I would call a "pocket meadow," I did not add as many grasses as would be typical in a naturally occurring meadow. But this is a designed planting to mimic a meadow, and I want to give you a little more color and ease your transition into native gardening.
You could do this plan by seed, but growing by seed creates its own set of challenges. Don't get me wrong; I use native seeds all the time, but by starting with small plugs or bare-root plants, you'll have a higher success rate, and I want your first time to be memorable!
Your natives won't bloom the first year, and it will take at least two seasons of growth before they do bloom. In the first couple of years, native plants invest energy in building deep root systems to withstand drought. Because they build deep root systems, you won't have to water after the first season.

Since your planting will look a little different from the landscapes around you, it's essential to make them look "intentional." People perceive native gardens very differently, especially when they contrast starkly with the lawns, boxwood hedges, and expanses of mulch most people see in their neighborhoods. If your new garden is next to the lawn or surrounded by grass, make sure you keep it mowed near your garden, so people know it's supposed to be there. You can also put up a couple of sections of split-rail fence on one side, perhaps a picket fence for a cottage look, or a low stone wall to distinguish your new garden.

Many landscape firms won't know how to manage your native plants, so let's be clear: you will likely end up being the most knowledgeable person regarding the plants in this small garden. Take the time to enjoy the process, knowing you're creating a beautiful, productive garden for yourself and the surrounding wildlife.
Resources For Native Plant Information
These are some of my favorite sites:
Michigan Wildflower Farm - Not only a great resource, but also ships native seeds
More Plans to Come
I'm committed to releasing new "mostly native" plant designs in the near future. The plans will address different zones, soil conditions, wildlife contributions, etc., to help us all adopt this healthier, less time-consuming, and more sustainable way of caring for our landscapes. So come back here often.
Let me know how you're doing with your native plant garden, send pictures, and don't forget to contact us at restoration-earth.org if you have questions!

Comments